Set up an automated scenario to publish new content from your blog to multiple platforms simultaneously.
Managing multiple social media accounts can be a challenge, but with the help of Make and the WordPress plugin Uncanny Automator, you can easily sync your posts. In this article, we will explore how to set up a scenario in Make that automatically monitors your blog and, upon detecting a new post, publishes the content to social media in an automated fashion. This makes it easy to promote your content, save time, and ensure that your social media accounts are always up-to-date with the latest blog posts.
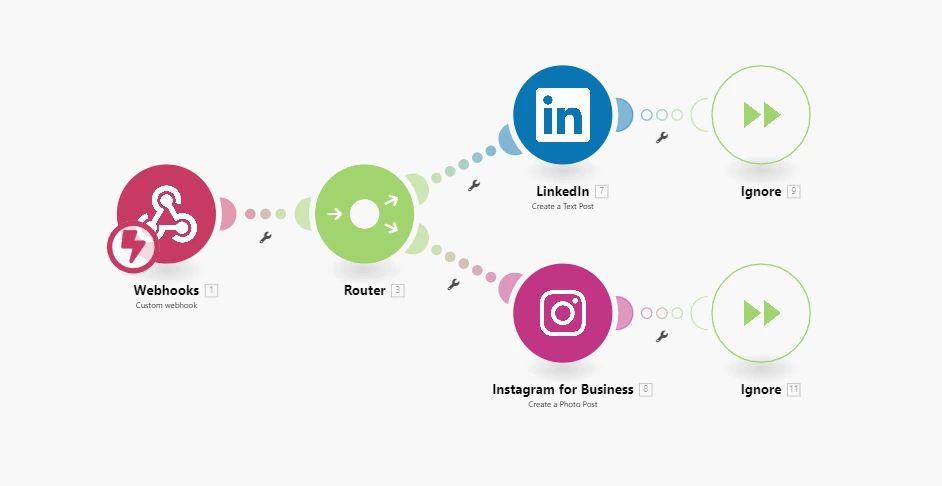
We will show you how to publish to LinkedIn and Instagram at the same time, but you can add any social media network you want that fits your marketing strategy. This way, you can expand your reach and maximize the impact of your publications.
In addition, we will cover the configuration of error handlers to ensure that the automation continues to function even if errors occur in one of the actions. This solution can be adapted to include other social networks and further optimize your digital marketing strategy.
Step 1: Create a New Scenario in Make
If you don’t already have an account on Make, don’t worry: it’s easy to get started. Visit the Make website and sign up for free. After logging in, you will have access to the main dashboard to create your automation scenarios. If you have any questions or encounter difficulties, check out this detailed guide to start using Make efficiently and easily.
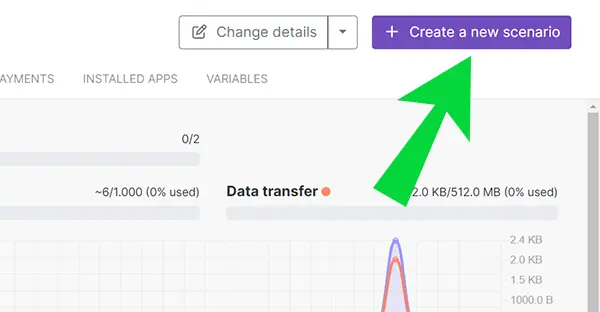
After logging in to your main Make dashboard, click on the button Create a new scenario to begin building your automation.
Step 2: Set Up the Trigger Module: Webhook
A webhook is a tool that allows communication between different systems over the internet. In this case, you can set up a webhook in Make to automatically receive data from a plugin that we will install in WordPress.
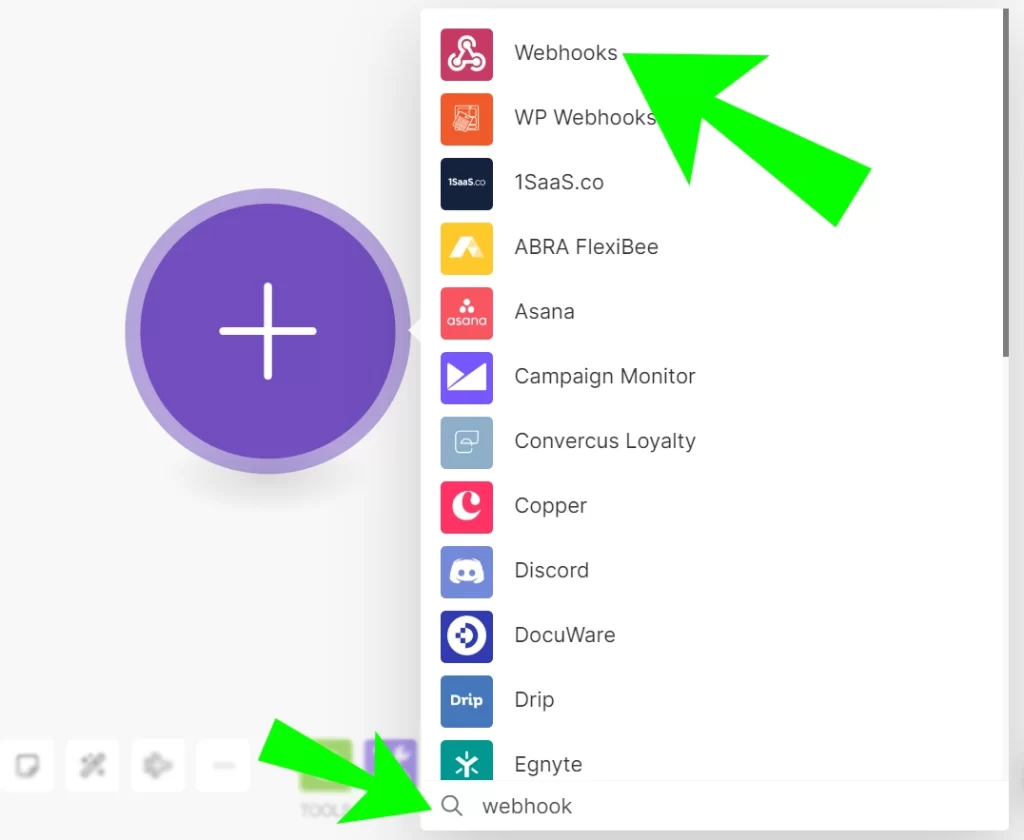
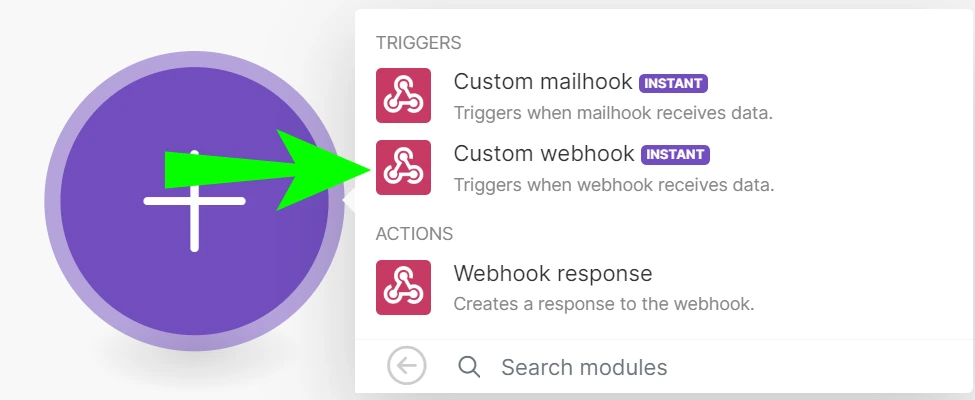
3.1 – Click on the module that appears on the page (a circle with a +) to add an initial module.
In the window that appears, type Webhook in the search bar and select the Webhook module.
3.2 –
3.2 – Click on Custom webhook (INSTANT)
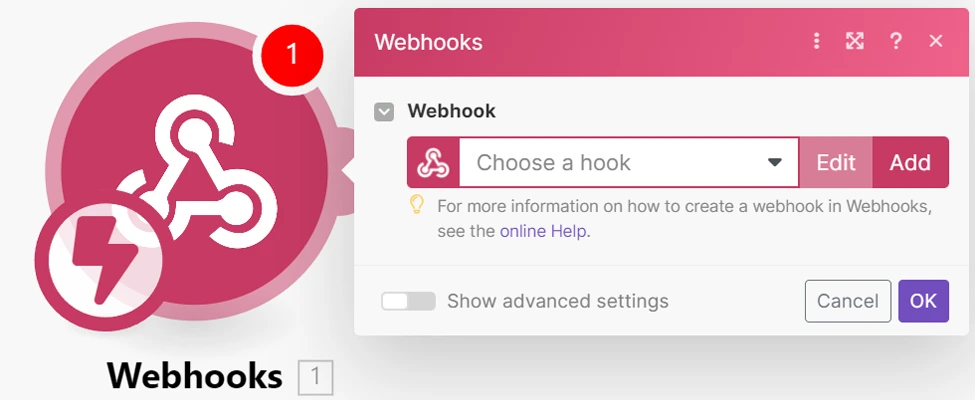
3.3 – Click Add to configure the new webhook.
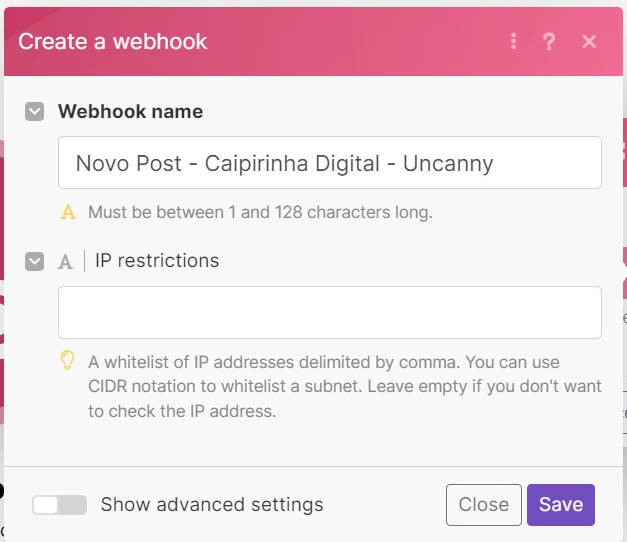
3.4 – Choose a name for your connection and click Save.
The name can be anything that helps you identify the connection later if needed.
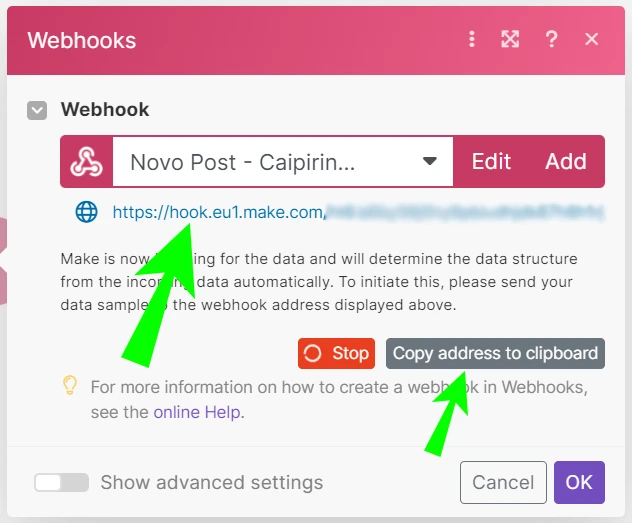
3.5 – After saving the connection, a new webhook URL will be generated.
This URL will be used to transmit data from your WordPress site to Make. To copy the URL, click on the link Copy address to clipboard.
It’s important not to close this screen, as we will return to this scenario later. We recommend keeping the Make site open in your internet browser to facilitate the process.
Step 3: Install the Uncanny Automator Plugin on Your WordPress
The Uncanny Automator plugin is a good solution for sending data from published articles automatically to Make in an immediate and automated manner. It allows you to create processes that connect to different applications and services, including Make, ensuring that data from your blog is sent effortlessly whenever a new article is published. This saves time and resources, ensuring that your automation works efficiently and without complications.
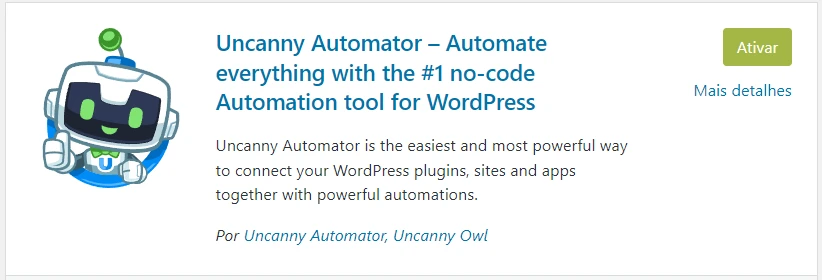
3.1 – To install the Uncanny Automator plugin, go to the Plugins page in your WordPress dashboard and click on “Add New”. Then, type “Uncanny Automator” in the search bar. When the plugin appears, click on “Install Now” and then “Activate”. Ready, the plugin is now installed and ready for use.
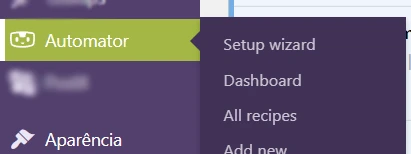
3.2 – In the menu on the left, click on Automator and then on Setup Wizard. Then, follow the instructions to create a new free account.
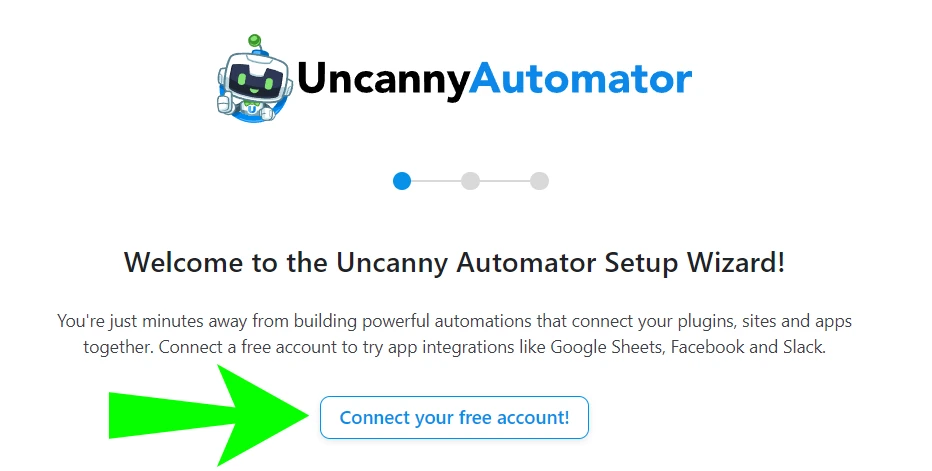
3.3 – Click on Connect your free account and then fill out the form to create a new account. The free version is sufficient for what we need here.
3.4 – After setting up your account, click on Return to Dashboard to return to the main Uncanny Automator dashboard.
Step 4: Create a New ‘Recipe’ in Uncanny Automator
Now we will create a new recipe in Uncanny Automator. The idea is to send data to Make (with the help of webhooks) when a new blog post is published.
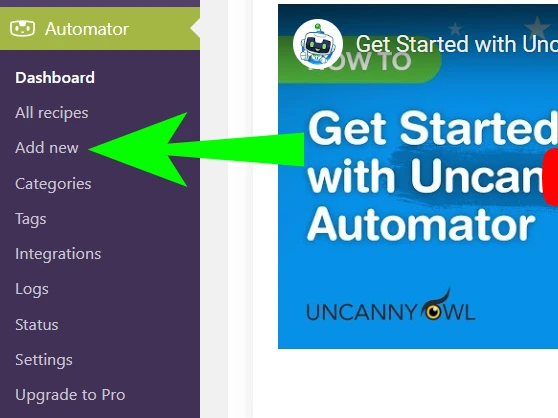
4.1 – In the plugin menu, click on Add new to start a new recipe. This will open a new page and ask you to choose a recipe type.
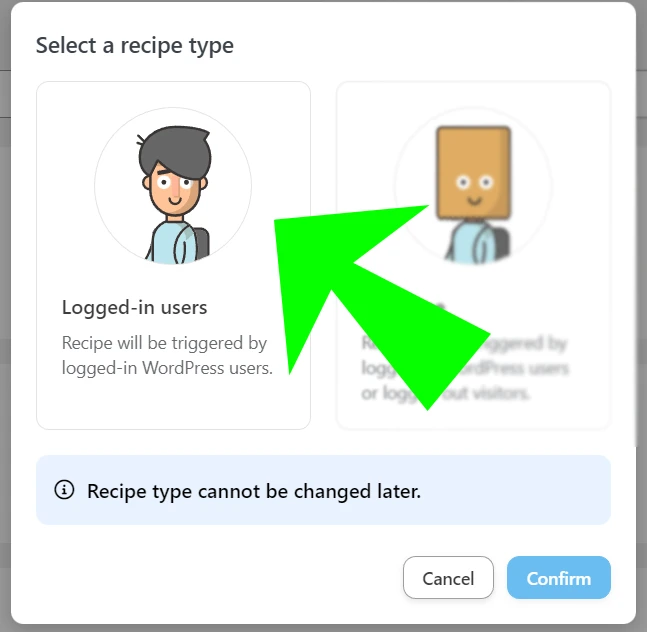
4.2 – Here, you should select the option Logged-in users and then click on Confirm.
We choose ‘Logged-in users’ because a new post can only be published by users who have an account on WordPress. In this way, we are informing Uncanny Automator that our recipe can only be triggered by users who are connected to the site.
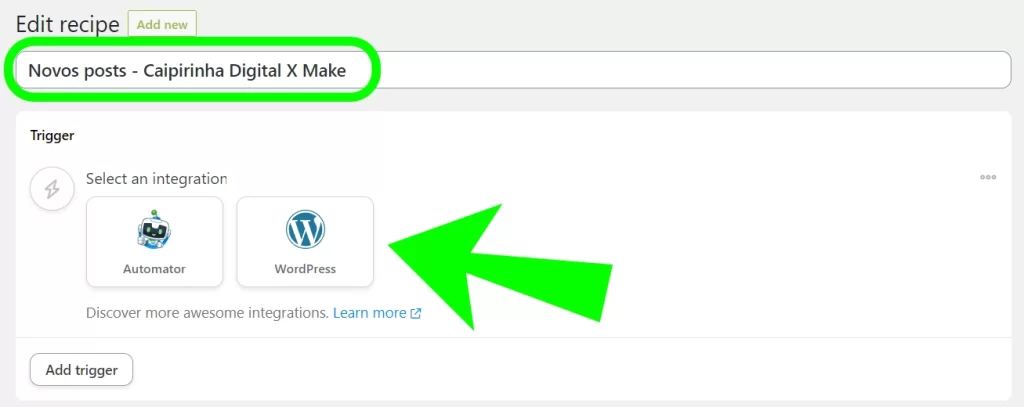
4.3 – Now, enter a title for the recipe. It will be used only as a future reference and can be whatever you want.
4.4 – Next, you need to define a trigger for our recipe. In this case, we want the publication of a new article on the blog to be the trigger.
Blog articles are a native feature of WordPress and can be found in the integration with WordPress itself. Therefore, select WordPress in the “Trigger: select an integration” option.
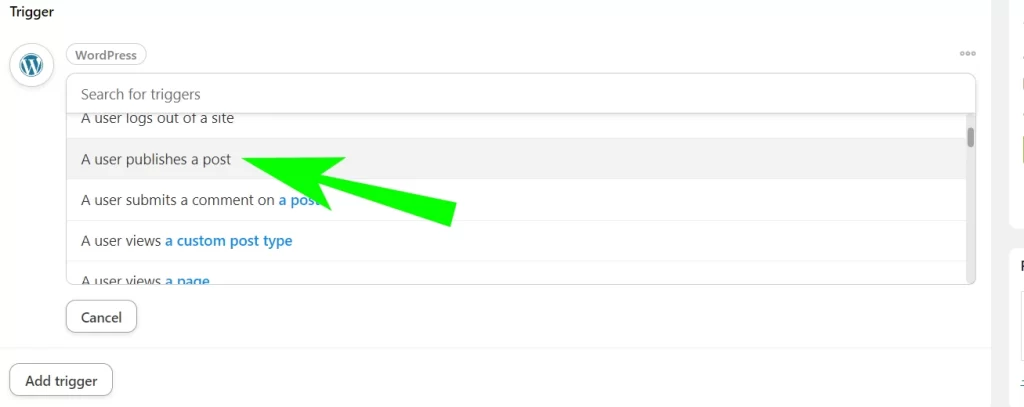
4.5- A list of trigger options will open. At this moment, select the option A user publishes a post.
This will cause our recipe to be triggered automatically whenever a new article is published on the site.
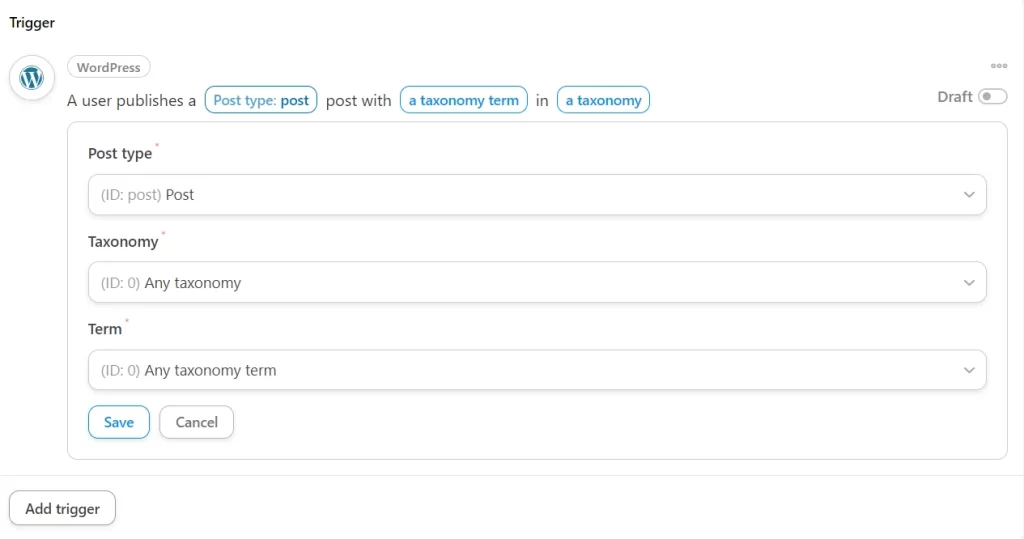
4.6- Now it’s time to configure what you want to share on social networks. If you want to share all new posts, you can leave it as it is (Any Taxonomy).
If you want to share content only from a specific category, you will need to configure the Taxonomy and Term options. For example, if you want to share blog posts from the “News” category exclusively, select “Category” in the Taxonomy option and “News” in the Term option.
4.7- Click Save to save the trigger.
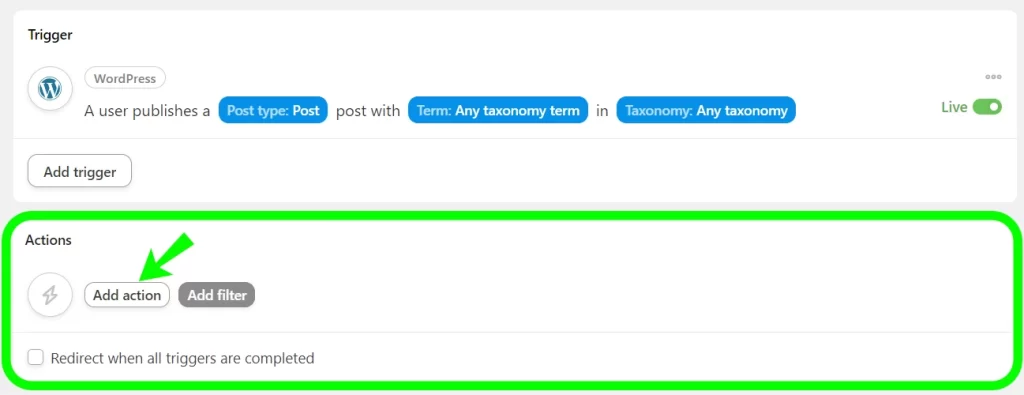
4.8- Now just configure the Action: Click on Add action.
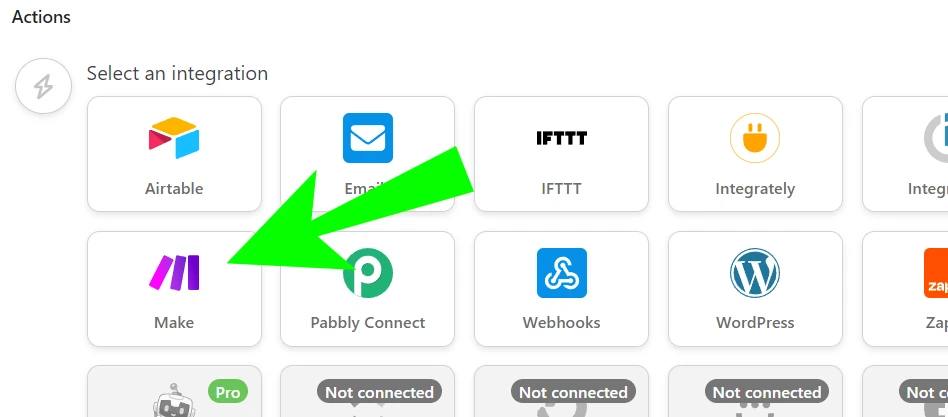
4.9- In the list of plugins and web applications, select Make to configure the action that will send the new post data to Make.
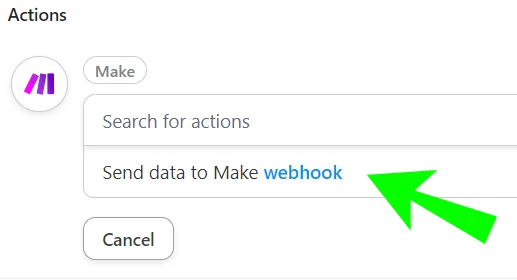
4.10- Select the option Send data to Make webhook
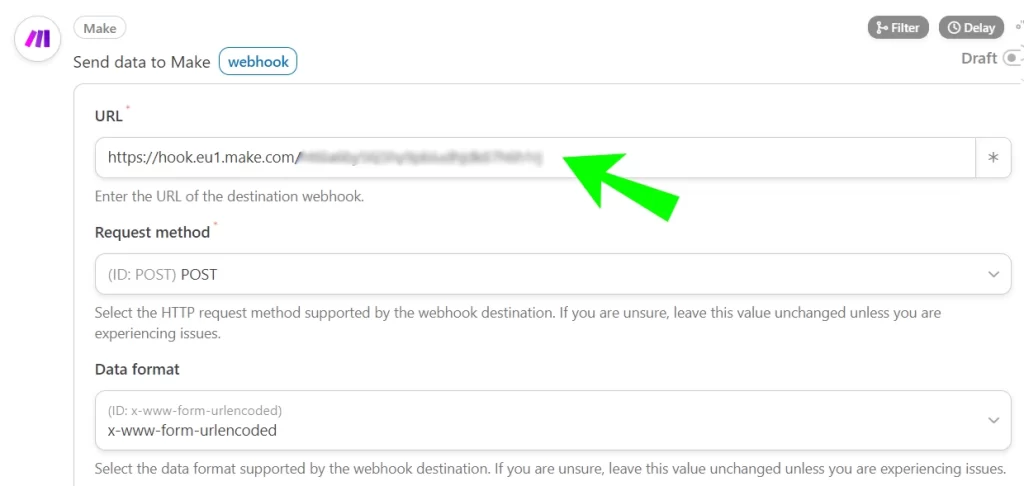
4.11- In the URL field, you need to paste the Make webhook URL that we copied in Step 2.
You can leave the Request Method and Data Format fields as they are.
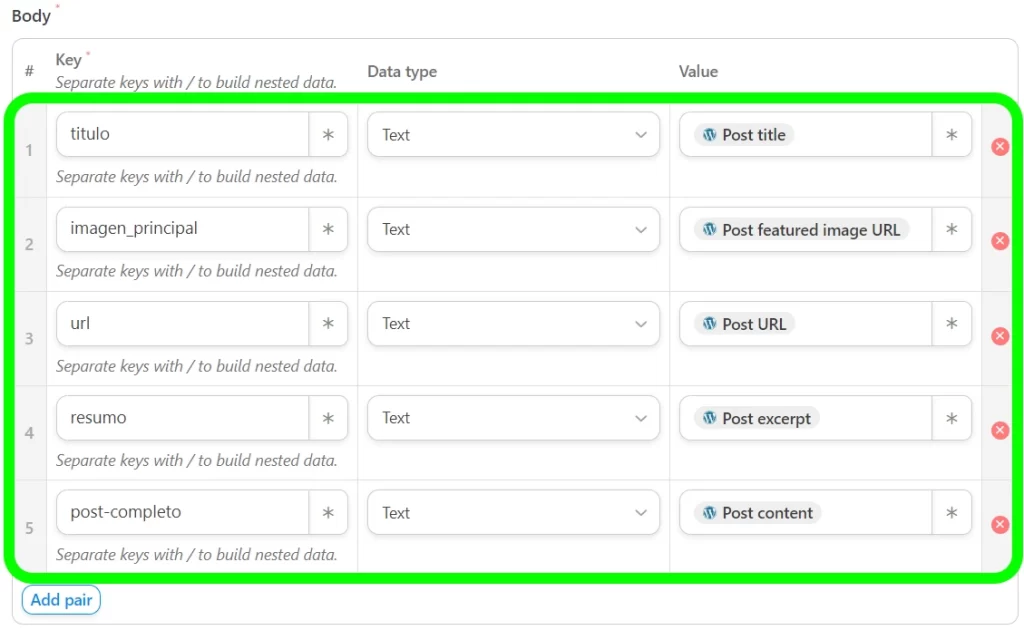
4.12- Configure the fields in the Body session.
To pass data between WordPress and Make, you need to organize the data in key-value pairs. Here, the key represents the label of the data and the value is the dynamic content in the form of tokens.
In the case of this automation, my intention is to create a small post with the summary of my blog for dissemination on social networks. I only need the following pairs:
- title ➡️ text ➡️Post Title
- main_image ➡️ text ➡️ Post featured image URL
- url ➡️ text ➡️ Post URL
- summary ➡️ text ➡️ Post Excerpt
- For this part to work you need to write a good post summary in the optional summary part when you are writing the post. If you are not used to writing this part, I recommend starting, as it will be very useful for you to promote your post.
- full_post ➡️ text ➡️ Post content
Step 5: Send a Test from Uncanny Automator to Make and Publish the Recipe
Before saving the setup, it is necessary to send a test of data to Make.
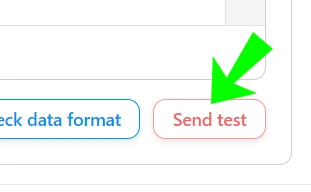
5.1- With Make open in another tab, click on Send Test to send a sample of data to Make.
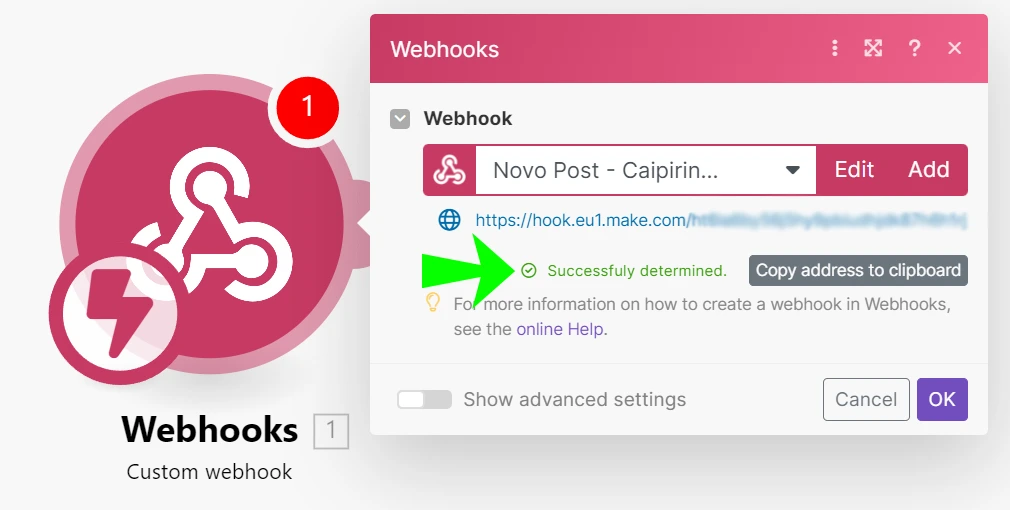
5.2- If you left the Webhook creation screen open, the red data waiting button should have been replaced by Successfully determined. Now, you can click “OK”.
If you closed that screen earlier, click on the Webhook module and then on “Redetermine data structure“. Then, repeat the previous process of “Send test“
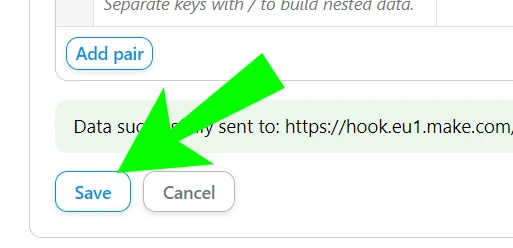
5.3- Finally, return to the Uncanny Automator tab and click on the Save button to make your action active.
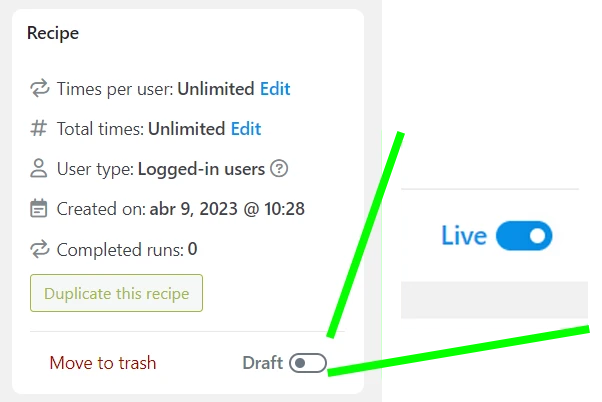
5.3- After configuring the trigger and the action, you need to make your recipe active.
To do this, you need to click on the toggle option in the Recipe box and change from Draft to Live.
Now your recipe is active. So, whenever a new blog post is published on your WordPress site, Uncanny Automator will send key/value pair data to Make.
Step 6: Add a Router Module in Your Make Scenario
The Router module in Make is a powerful and versatile tool that allows executing multiple independent actions within a single scenario. In this case, I recommend using the Router to ensure that even if an error occurs in one of the social network actions, the others continue to be executed without interruptions. This ensures greater stability and efficiency in the workflow we are creating, allowing multiple tasks to be executed in parallel, keeping the process running smoothly.
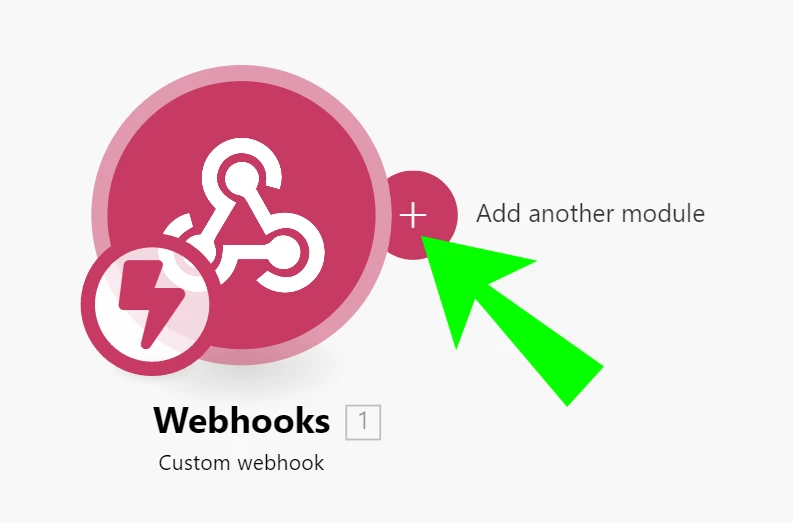
6.1- Add a new module by clicking on the + next to the module we just set up
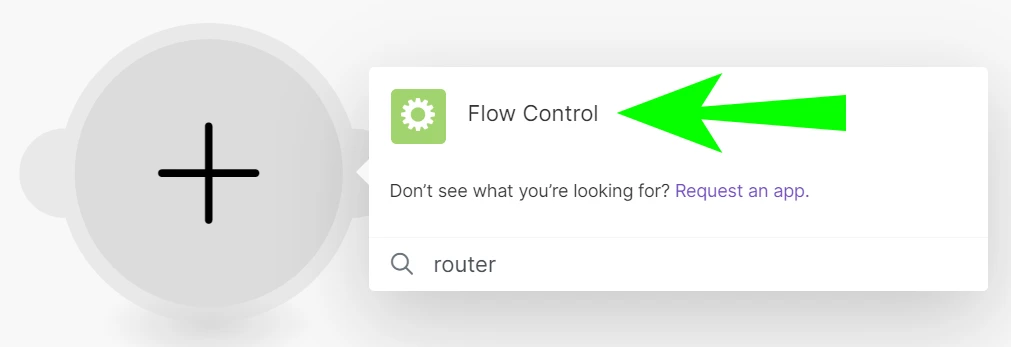
6.2- Type Router and select the Flow Control option.
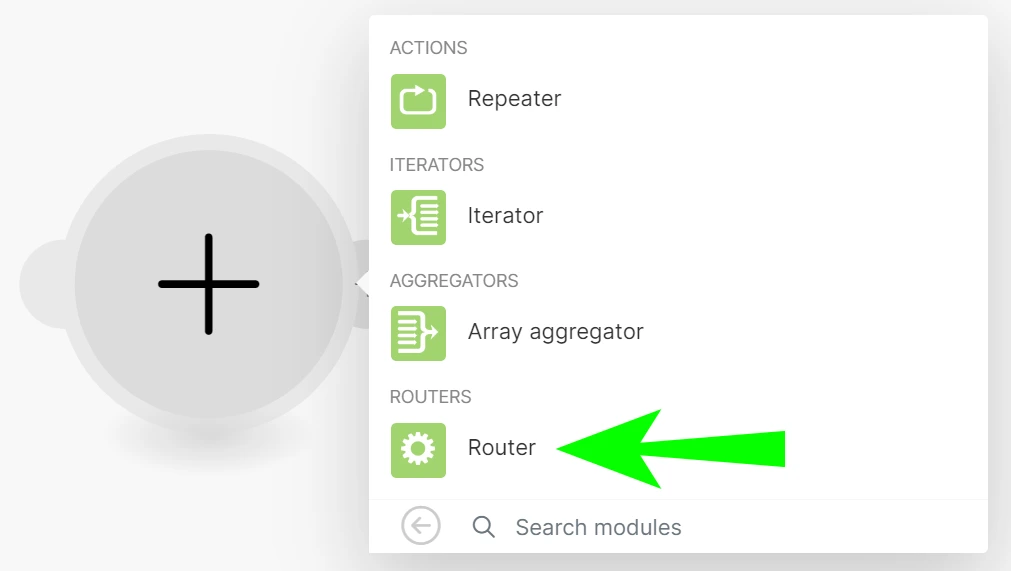
6.3- Select the Router
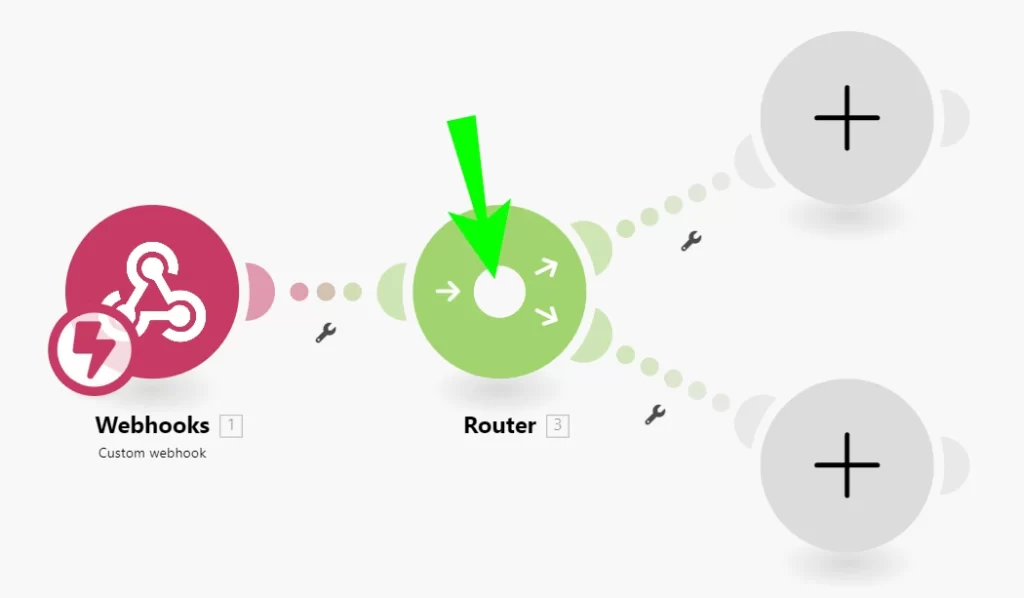
6.4- The module is added and automatically two paths are added. If you need to add more, just click on the + that appears in the center of the circle when you hover the mouse over it.
For this exercise, we will only connect Instagram and LinkedIn, so two paths are enough for us.
If you accidentally created an extra path, right-click on the one you want to delete and click Delete Module.
Step 7: Connect LinkedIn to Make
In this next step, we will connect LinkedIn to Make so that you can automatically post to your professional account whenever a new post is published on your blog. By integrating LinkedIn with Make, you are optimizing your content-sharing process and ensuring a more consistent and effective presence on the platform, reaching your target audience and generating greater engagement with your content.
If you already have your accounts connected to Make skip to step 8.
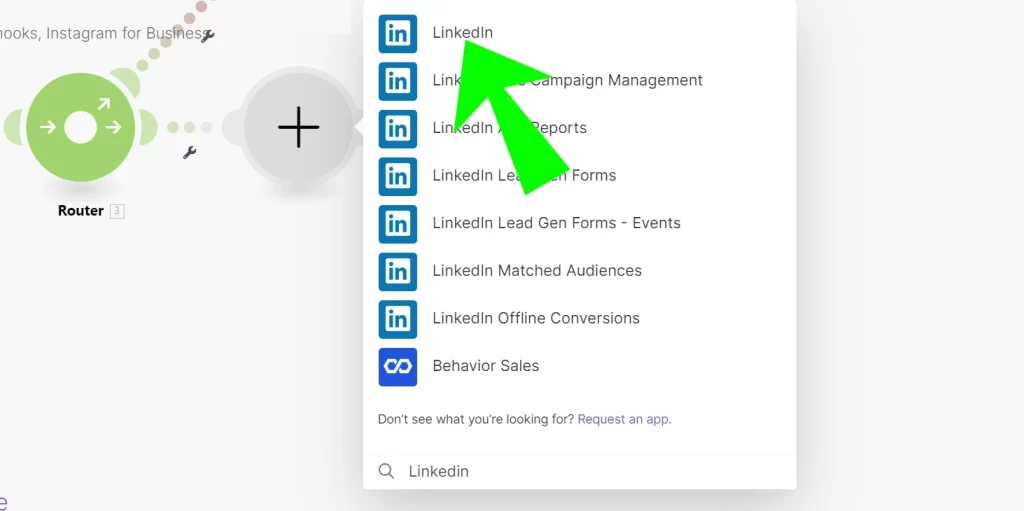
7.1- Select the LinkedIn module.
You can add the new module by clicking on the gray module, typing LinkedIn, and selecting the corresponding option.
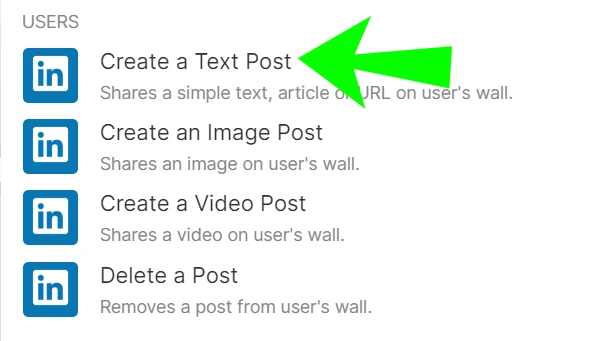
7.2- We will add a link-style post. For this, select Create a Text Post.
In this case, I will add the blog call from my user profile (USERS). But if you want to add it to the Organization’s page, select the item related to the publication in the ORGANIZATIONS part.
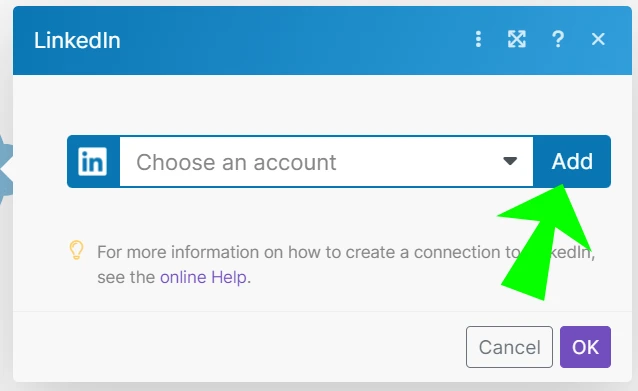
7.3- Click Add.
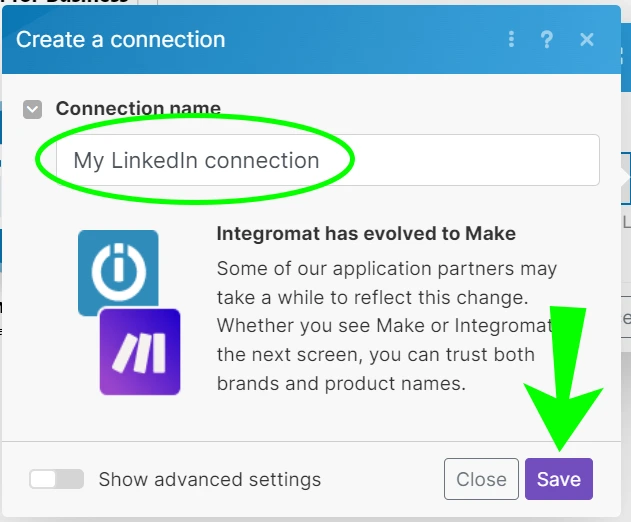
7.4- Select a connection name of your choice and click Save.
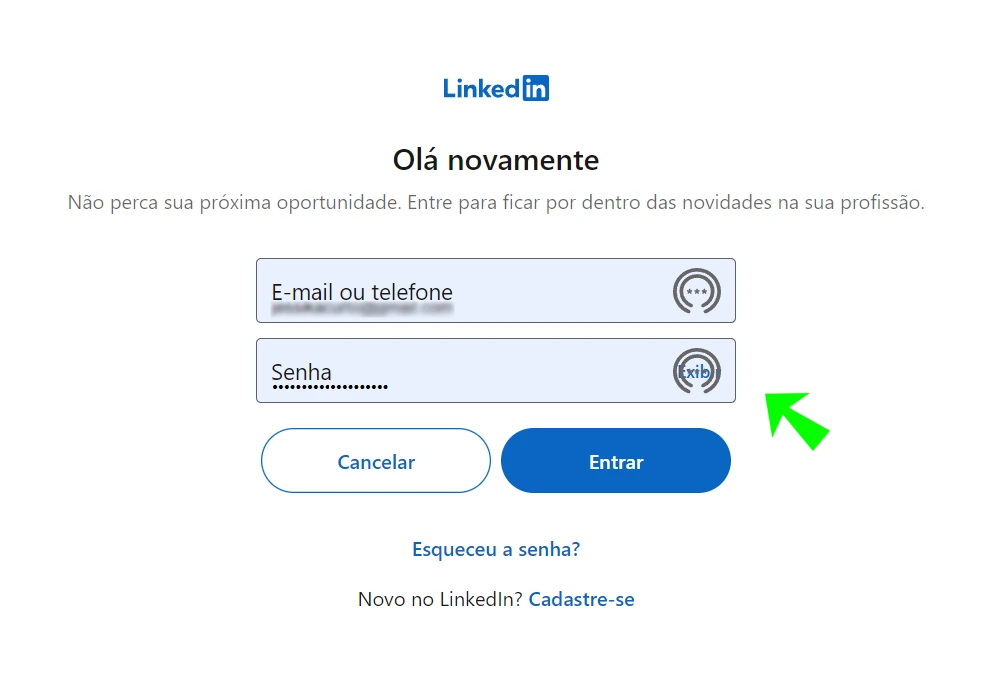
7.5- You may need to provide your LinkedIn login credentials to allow Make to connect to your account. Follow the instructions on the screen to log in and authorize the connection.
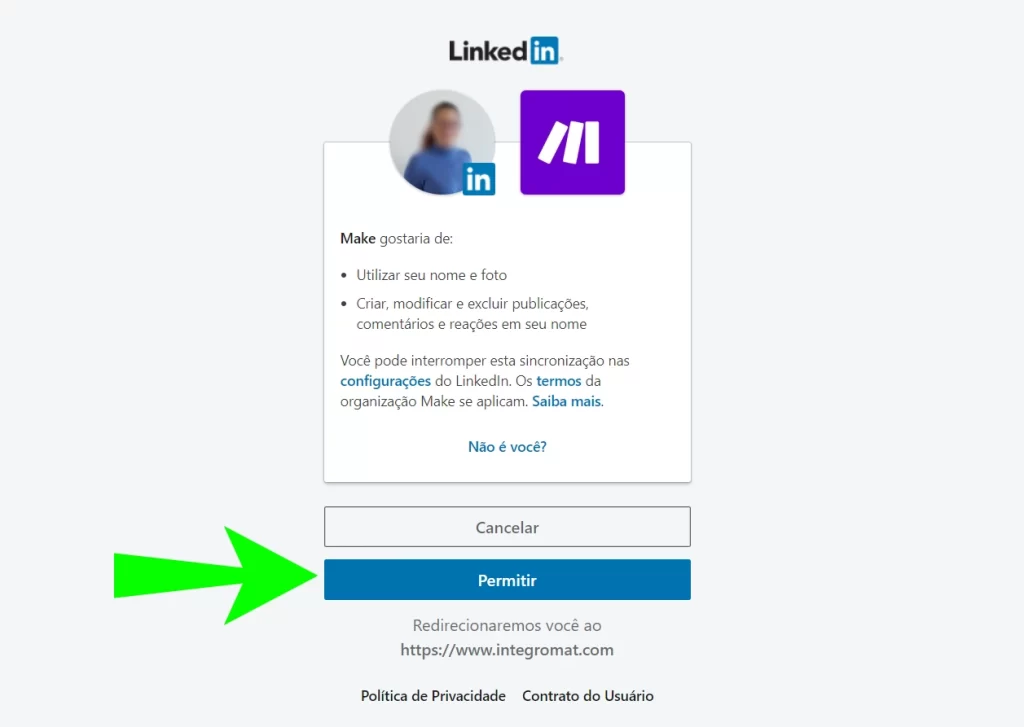
7.6- Authorize Make to make the necessary changes in LinkedIn by clicking Allow.
It’s important to remember that by authorizing Make to make the necessary changes to your LinkedIn account, you are granting permissions for it to post on your behalf. Make sure you are aware of this before clicking “Allow”.
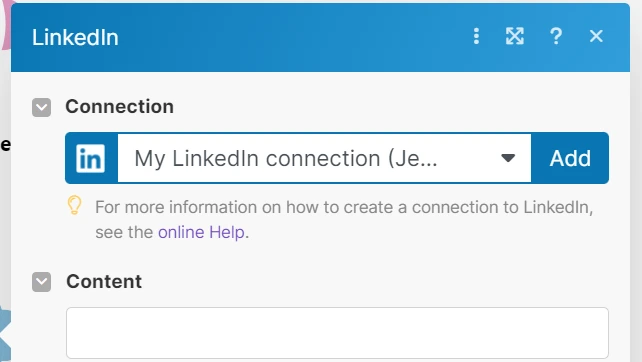
7.7- Ready. Your LinkedIn is connected.
Step 8: Configure the LinkedIn Module
Now, we will proceed to the action of configuring the LinkedIn module, linking the values that come from the webhook module. This way, we will ensure that all the necessary information is sent correctly from the webhook to the LinkedIn module, ensuring an appropriate and well-structured publication when the new content is shared on the platform.
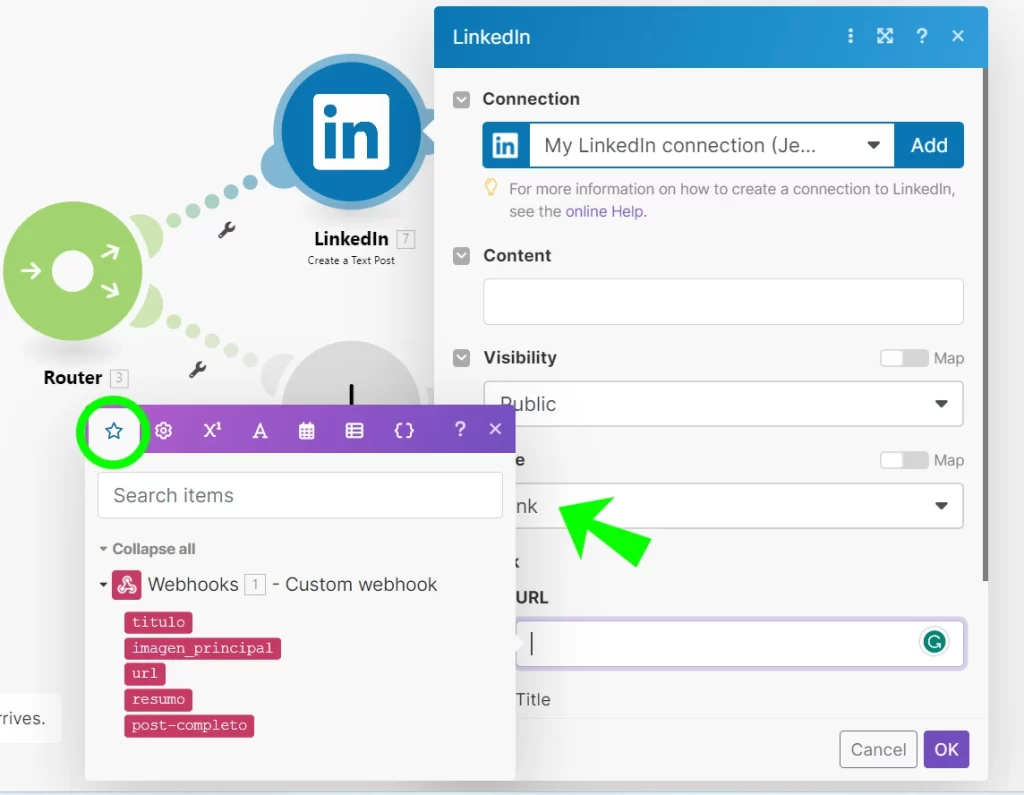
8.1- To map the fields, you should click on the blank space next to the field name in the LinkedIn module, and in the window that opens, click on the star tab to select the corresponding field that comes from the webhook module. Repeat this process for all fields that need to be mapped.
Considering the Uncanny Automator fields that we configured earlier:
- Content: A text to draw attention to the article. For example:
📣 New on the blog!
🌟 Don’t miss the chance to stay updated and expand your knowledge! - Visibility: Public. So that it is a public post.
- URL: url field of the Webhook module.
- Title: title field of the Webhook module.
- Description: summary field of the Webhook module.
Step 9: Connect Instagram to Make
Attention!
For Instagram, you need to meet some conditions:
Your Instagram account has to be a Business account (it does not work with Personal or Content Creators)
▪️ Your Instagram account needs to be connected to the Meta Business Center.
▪️ Your Featured Image photo from the post must have a ratio between 4:5 and 1.91:1, width between 320 and 1440 pixels, and JPEG format (although I use WEBP and it works).
To start, let’s connect Instagram and create a photo post, using the featured image of the post as the image of the post and the description as the caption. This way, your publications on Instagram will have a consistent and attractive visual, in addition to relevant information for the followers.
It is essential that, for the publication of the post, you have properly established the featured image and description.
If you already have your accounts connected to Make skip to step 10.
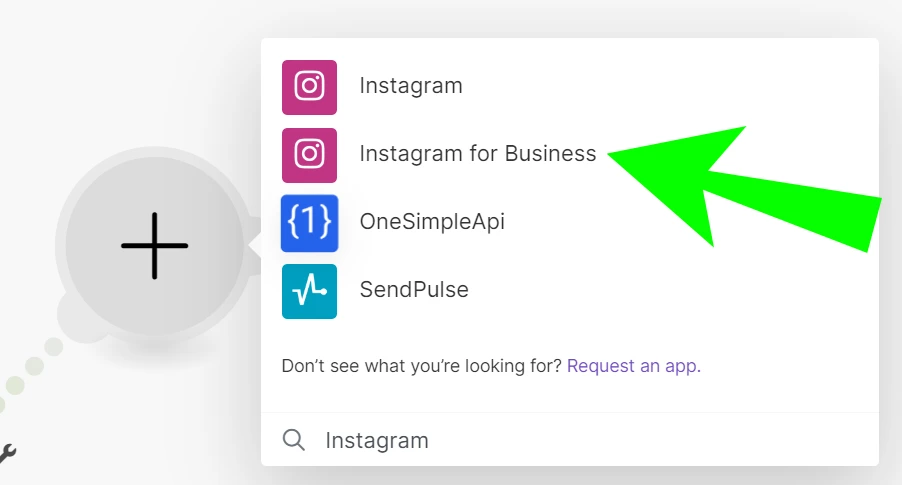
8.1- Select the Instagram for Business module.
You can add the new module by clicking on the gray module, typing Instagram, and selecting the option for Instagram for Business.
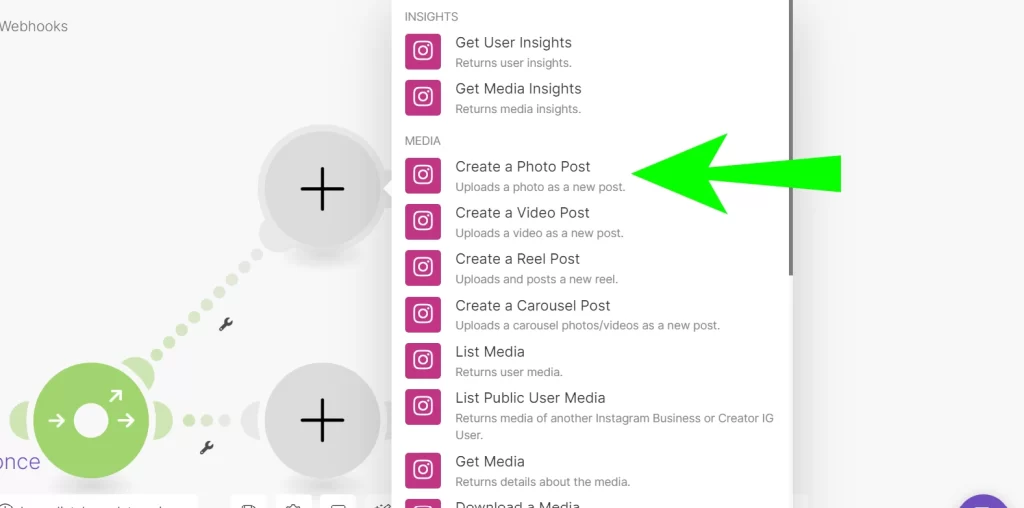
8.2- Select the option Create a Photo Post.
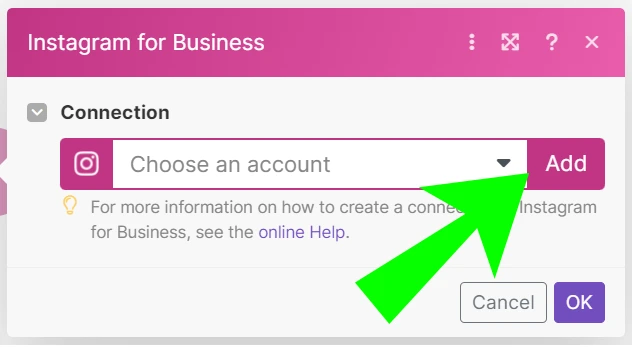
8.3- Click the Add button to link the application to your respective social network account.
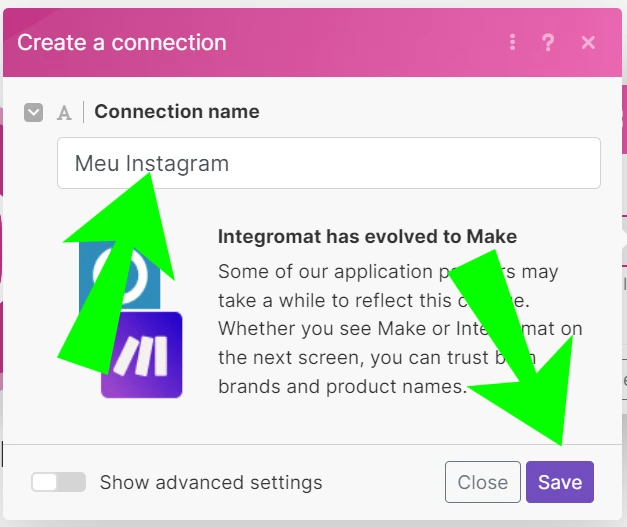
8.4- Select a name for your connection and click Save.
It is important to give a clear and easily identifiable name to the connection so that it can be easily located if any changes or queries are needed in the future.
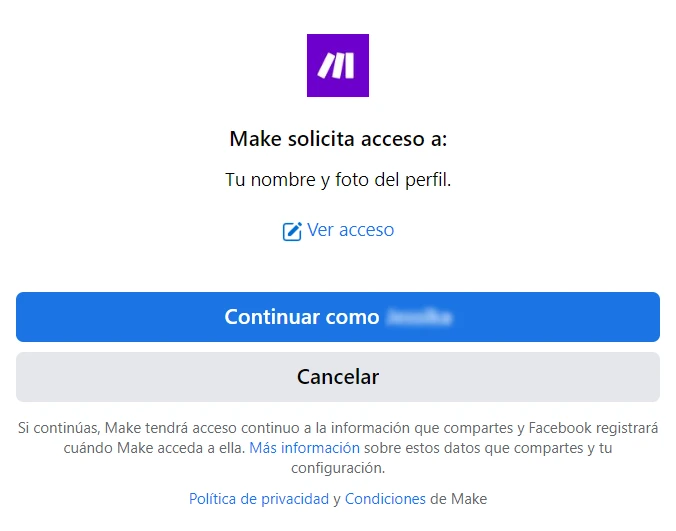
8.5- You will be redirected to the page where you will need to enter your Meta credentials or confirm your profile if you are already logged in.
This is to give access to your Meta Business Suite account.
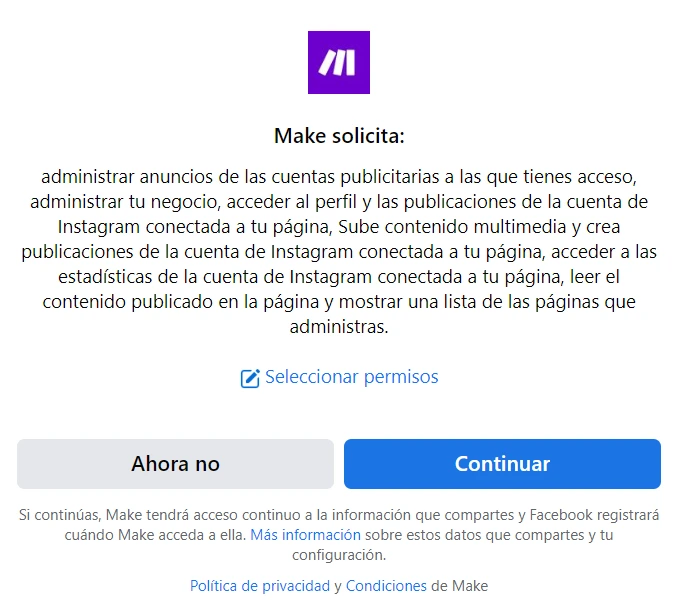
8.6- It’s time to grant permissions for Make to access and manage your postings on these platforms.
Click Continue.
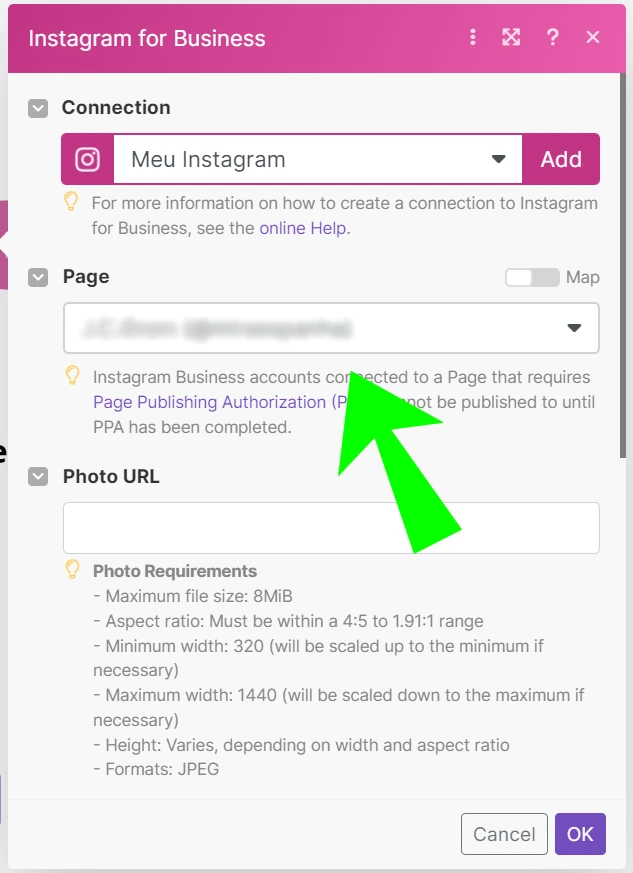
8.7- Ready, it’s connected! To confirm, in Page you have a list of all the pages and Instagram accounts connected to your Meta Business Suite account.
Step 10: Configure the Instagram Module
We will map all the information received by the webhook to the Instagram module. This will ensure that the data from your blog, such as title and photo, are correctly used when creating the publication on Instagram, ensuring that the integration works efficiently and the information is displayed correctly.
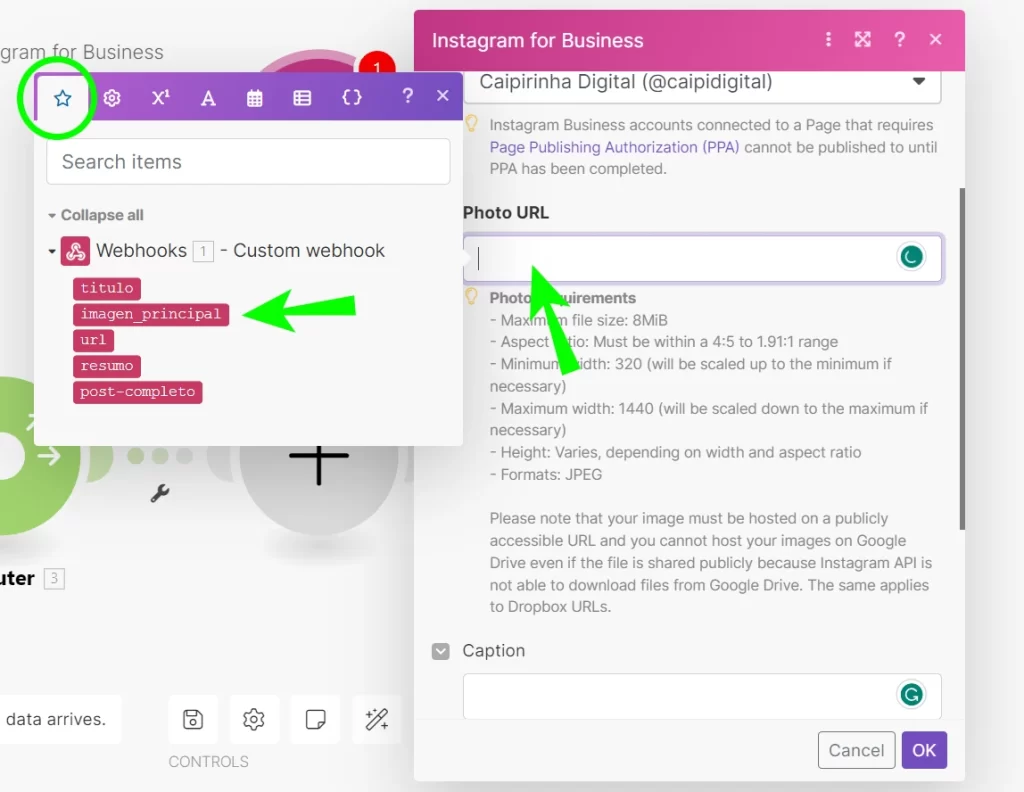
9.1- To map the fields, click with the mouse on the corresponding space and, in the box that opens, select each of the corresponding fields in the tab with the star. This considering the fields of Uncanny Automator that were configured earlier.
- Caption: the caption of your photo. To simplify, I would put “summary” and add some phrases like: Learn more in the new article we just published on our blog. Link in bio.
- You can add #hashtags and @mentions.
- User Tag: if you want to mention another user in the photo. All posts will carry the same mention.
- Location ID: if you want to search and add some location. Attention: all posts will carry the same location you add here.
Step 11: Error Protection
Now, to finish, a simple step. We will configure two additional modules to ensure that, if an error occurs during automation, the process is not interrupted. Errors can occur if, for example, the article is published without a photo, or if it has some format that is not supported by Make or the social networks.
For this, we will add “Error Handler” modules to our configuration. These modules are essential to keep automation running smoothly and avoid unwanted interruptions in case of possible failures.
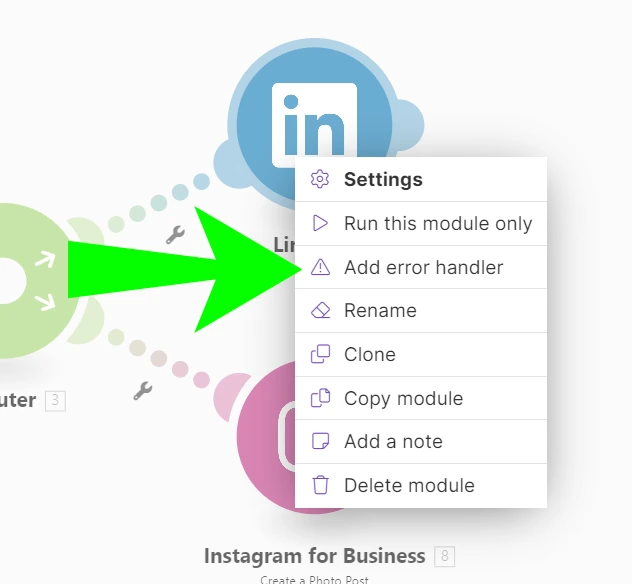
10.1- In each of the social network modules we just added, right-click and select Add error handler.
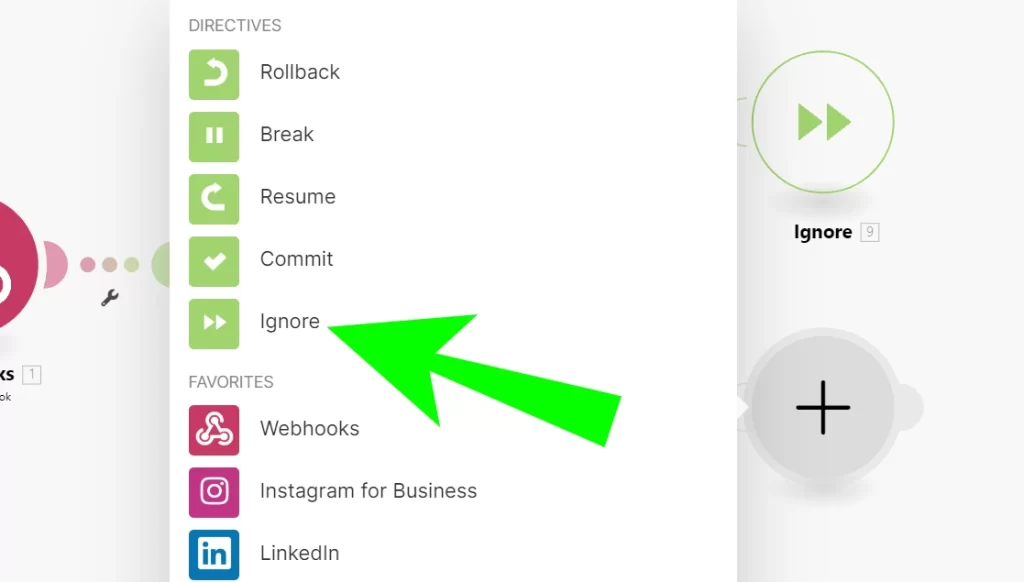
10.2- For this case, configure the action Ignore.
By configuring the error handler “Ignore” in the Instagram and LinkedIn modules, if an error occurs in one of the modules, the other action in the Router route will continue to be executed without interruption. This allows the automation to proceed even if an error occurs in one of the social network publication actions.
Result

Congratulations! Now you have an efficient automation that, every time you publish an article on your blog, it will be automatically shared on Instagram and LinkedIn.
By implementing this solution, you optimize your time and ensure that your content reaches a wider audience, improving the visibility of your blog and increasing the chances of engagement and conversion. This successful automation is an example of how the integration of different platforms and tools can boost your content marketing strategy and enhance your results.
With this automation, you can add as many social networks as needed to meet your marketing strategy. Remember that all the steps mentioned can be optimized and adjusted to further improve your marketing strategy. The process we created is basic, but offers enough flexibility to be refined according to your specific needs.

