Learn what Google’s latest generation of analytics is and how to set it up
In college, professors always used to say that you can only optimize what you can measure. Google Analytics is a free tool from Google that allows you to track and understand customer behavior on your website.
It provides the information needed to help you shape a successful digital business strategy by discovering things you probably never knew about your website visitors, such as which pages they visit, how long they stay, where they click, what technology they use, where they’re from, and much more.
Universal Analytics vs. GA4
If you had Google Analytics installed on your website before October 2020, you probably have the Universal Analytics (UA) property, which is the version of Google Analytics introduced in 2012 and is still in use today.
Google Analytics 4 (or GA4) was introduced in 2019 and is the newest method. Both versions coexist and are completely independent of each other. So, if you have one and want to install the other, you need to create a new property and install a new code on your website.
There are many differences between the properties, but in my opinion, the most relevant ones are GA4’s ability to collect and analyze data across websites and applications (while UA collects separately) and the process of identifying each unique user, which GA4 does more reliably.
If you’re still using Universal Analytics and haven’t set up the GA4 property on your website yet, consider this article as a sign! Google has announced that it will phase out UA in July of this year!
Is it worth installing Google Analytics 4?

If you’re installing Google Analytics on your website for the first time, you’ll probably be setting up GA4. Now, if you already have Universal Analytics, the question is, is it worth adding GA4?
This question has a simple answer: if you want to have any method of tracking your website’s statistics (and you SHOULD want that), you need to set up and install GA4! It’s non-negotiable!
As I mentioned earlier, Google will deactivate UA in July. Universal Analytics and GA4 are two separate platforms with two different data collection systems. So, you need to start collecting data with GA4 as soon as possible so that when you make the switch from one to the other, you already have a decent amount of historical data collected.
How to Install Google Analytics 4
The first thing you need is a Google Analytics account.
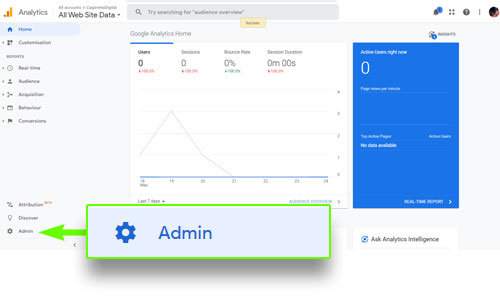
Once in your account, go to the ADMIN panel.
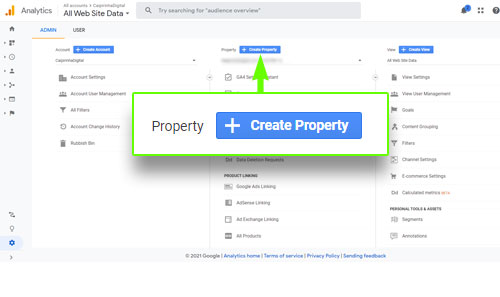
In the property panel, click on Create Property.
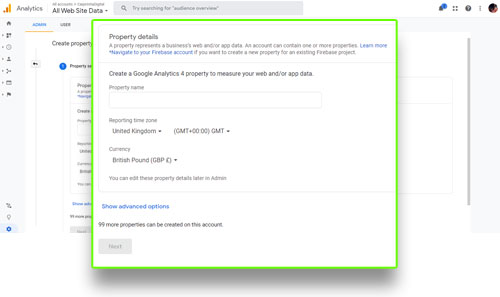
Give your property a name and configure the time zone and currency, then click Next.
A good practice is to give it a clear name that identifies your website and the type of property.
- If you choose a time zone that observes daylight saving time, Analytics will automatically adjust to the time changes.
- The time zone change only affects future data.
- Analytics servers may take up to a day to process the time zone change, causing data to take up to a day to appear in the new time zone.
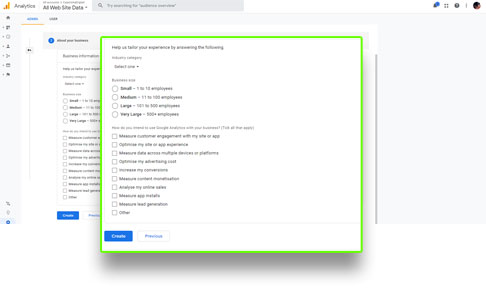
Fill in your company’s information accurately. At the moment, it doesn’t make much of a difference, but Google has hinted that in the future, it will provide specific features depending on what you have configured here.
Now choose the data source for your property: Website, Android app, or iOS app. In this case, we’ll choose Website.
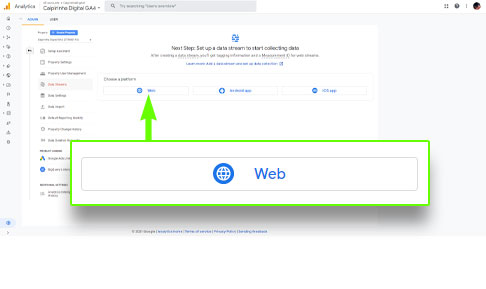
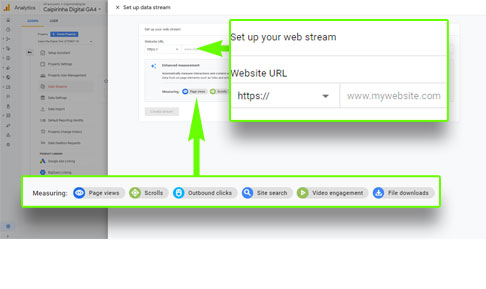
Enter your site’s URL and name.
It’s interesting to note that without needing to configure anything extra, Google already collects information like loaded pages, scrolls, clicks, site searches, video time, and downloads.
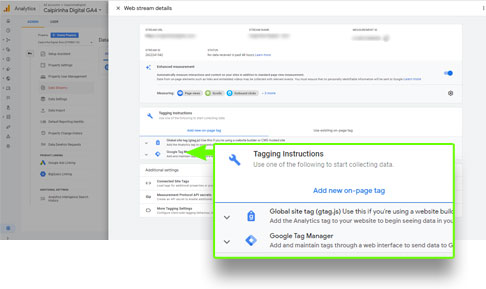
Once created, you need to install the property on your website. Here you have two options: Paste the tag into the code in the <head> section of your pages or install it through Google Tag Manager.
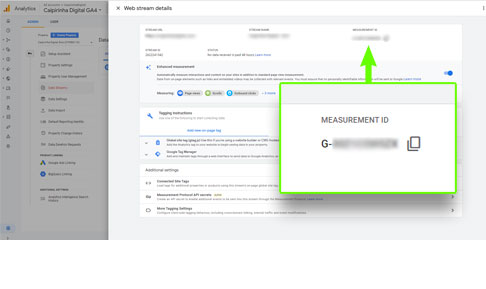
Copy your ID, which you will need in the next step when we paste this number into Tag Manager.

Let’s install it through Google Tag Manager.
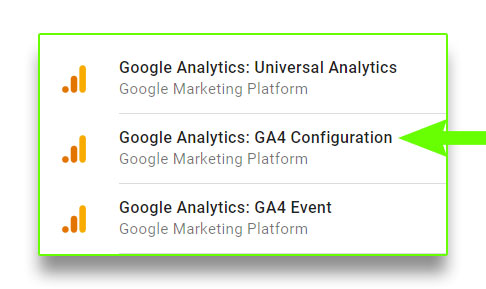
Log into your account and create a new tag. Choose Google Analytics: GA4 Configuration.
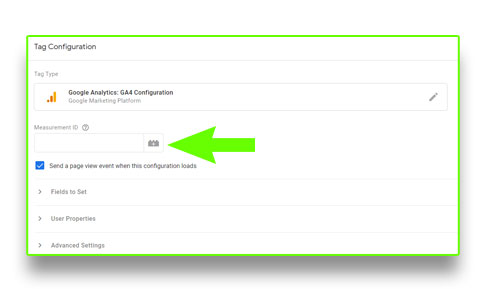
Paste the ID you copied from Google Analytics into the Measurement ID field.
Paste the whole number, including G-.
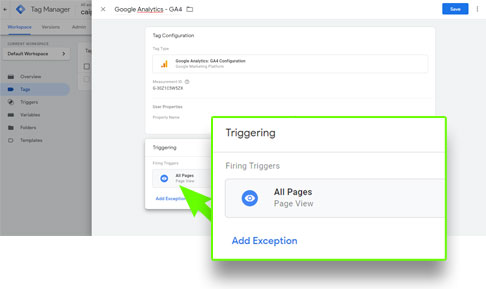
Configure it for All Pages.
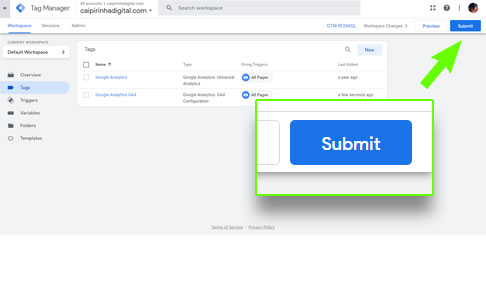
Click Send and then Publish.
Testing Your Configuration
After publishing your Tag through Google Tag Manager, your Analytics 4 should be set up and working!
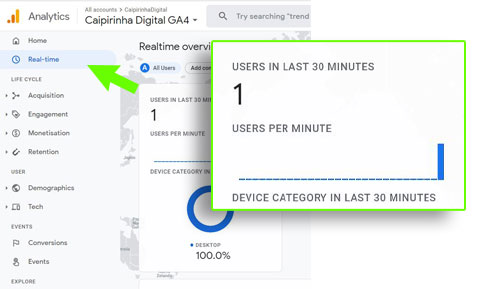
To test it, open your website in one window and your Google Analytics account in another. Go to Real-time, where you should be able to see active users right now; the number should be greater than 0.
Possible Errors
You’ve done everything correctly, but there are no numbers in the Real-time section. The number is 0, even though you’re on the site. What now? Below is a table with common reasons for this error:
It’s a matter of time.
99.9% of the time, code installations generate an immediate response in the Analytics platform, but there are those rare exceptions that take a little longer. Google itself asks you to wait up to 24 hours.
The gtag.js tag is in the wrong place.
If you installed Analytics by attaching the code to your site, you may have pasted it in the wrong place. It needs to be right after the <head> tag of your site.
You’re using the wrong tag.
If you’re installing the GA4 tag, make sure the identification number starts with G-.
The original code was modified.
When pasting the code on your site, be careful not to change ANYTHING. Adding spaces and characters can invalidate the tag.
Tag Manager tags are in the wrong place.
If you installed through Google Tag Manager, confirm that the GTM tags are pasted in the right place. They need to be in the header.php file, the first one right after <head> and the second one right after <body>.
The Tag Manager tag hasn’t been published.
All changes and new tag creations need to be published. So, when you finish adding the GA4 tag, you need to publish it so it appears on the site (click the Send button and then Publish in the upper right corner).
There you go! You’ve done everything correctly and have already started receiving traffic information on your page. Now, the next step is to learn how to use the platform and analyze the most useful information for you.

